Managing all your links, such as your blog, social media profiles, online store, or YouTube channel, can quickly turn into a game of “Where’s that link again?”. It’s easy for things to get scattered, and for your audience, tracking down what they’re looking for can be a bit of a hassle. That’s where a bio site comes in handy.
To create a bio site, pick a link in bio builder, start from a template or a blank page, add your photo, name and a one-line bio, add blocks for your links, socials and content, then publish the page and paste its address into your social profiles. With Replug you can do it on the Free plan, which includes 2 bio link pages, according to Replug’s pricing page (checked October 2026).
In this guide, we’ll walk you through what a bio site is, how it differs from a simple link in bio page and a website, what to put on it, and how to create one using Replug.io in 6 steps.
What is a bio site?
A bio site is a one-page website made for the link in your social profiles. It collects your important links and a little content (a video, a featured product, a sign-up form) on one mobile-friendly page with one short address.
It’s basically like your online hub where visitors can click on one link and instantly access your blog, social media accounts, e-commerce store, latest YouTube videos, or even your favorite Spotify playlist. You can also view some bio link examples to get a better understanding of how they work. It’s a quick, convenient way to share everything without bombarding your audience with a long list of URLs.
You will also see “Bio Sites” as a product name: Squarespace calls its free link in bio tool Bio Sites and describes a Bio Site as “a beautiful one-page website you can create in minutes that easily links to everything you offer in one place” on its Bio Sites page (checked October 2026). The idea is the same whichever tool you use.
Related: How to put YouTube link in Instagram bio?
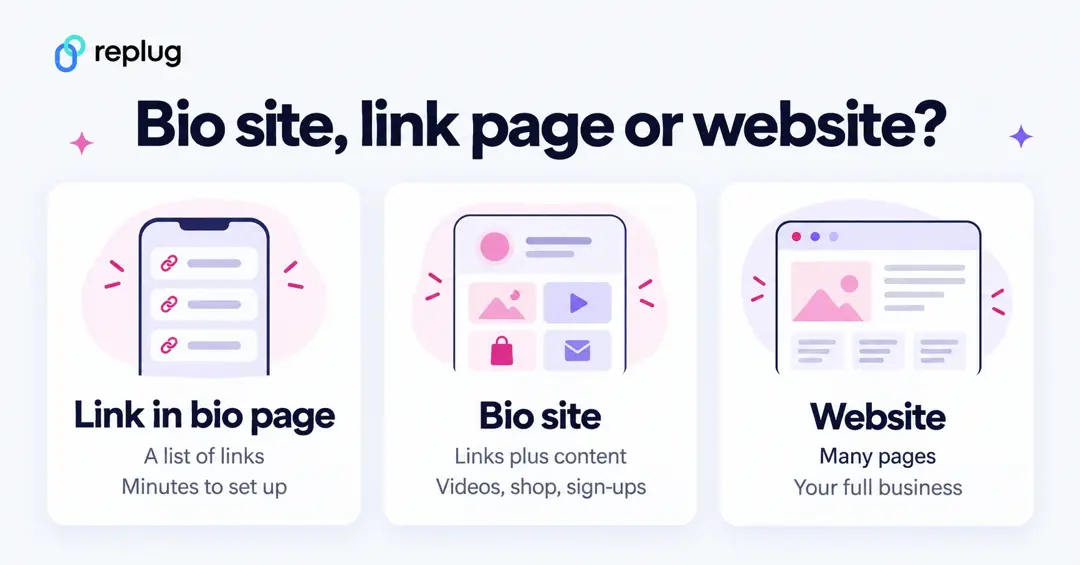
Bio site vs link in bio page vs website
The three overlap, so here is the practical difference:
- Link in bio page: a short list of buttons. Read what link in bio means if you are new to the idea.
- Bio site: the same single page, plus content such as a video, product cards, a booking calendar or an email sign-up, styled to match your brand.
- Website: many pages, your own domain and room for everything about your business. A bio site often sits in front of it.
Why do you need a bio site?
Now, you might be thinking, “Can’t I just add my website link to my social bio?” Sure, but a bio site offers way more flexibility. There are many benefits of bio links, but to name a few, here’s why you need a bio site:
- Saves time: No need to constantly change the link in your profiles. Just update your bio site, and everything stays fresh behind a single link.
- Boosts engagement: An organized bio site makes it easier for followers to find what they’re interested in.
- Branding control: Customize your bio site with your colors, fonts, and buttons so it reflects your personal style or brand.
- Great for marketing: Use call-to-action buttons, embed videos, and track clicks on each link, all in one place.
- Perfect for social media: A bio site works around the limited link space on platforms like Instagram, TikTok, and X (Twitter), giving you room to share everything.
- Better user experience: Your followers won’t have to search for your content. Everything they need is organized in one simple URL.
What to put on your bio site
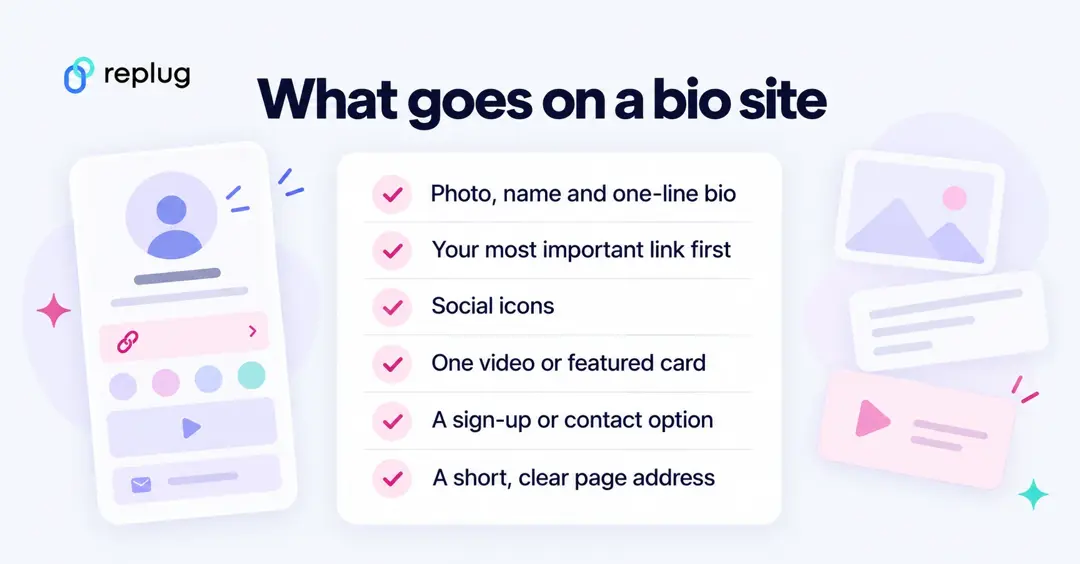
- A clear photo or logo, your name and one line about what you do
- Your most important link at the top (your shop, newest video or booking page)
- Social icons for the profiles you want people to follow
- One piece of content, such as a video or a featured card
- A way to stay in touch: an email sign-up or contact details
- A short, readable page address
How to create a bio site in 6 easy steps using Replug
Setting up a bio site is easier than you think. Just follow these steps through our link in bio builder, and you’ll have a working bio site in minutes.
Before you start: choose a bio site app
There are plenty of bio site apps out there. Look for a free plan, templates you like, the blocks you need (video, shop, sign-ups), click analytics and the option to use your own domain. Replug covers those: link in bio pages sit next to your short links, QR codes and click analytics in one dashboard.
1. Sign in or create a new account
Head over to Replug and create your account. If you already have an account, just log in to get started. No credit card is needed for the Free plan.
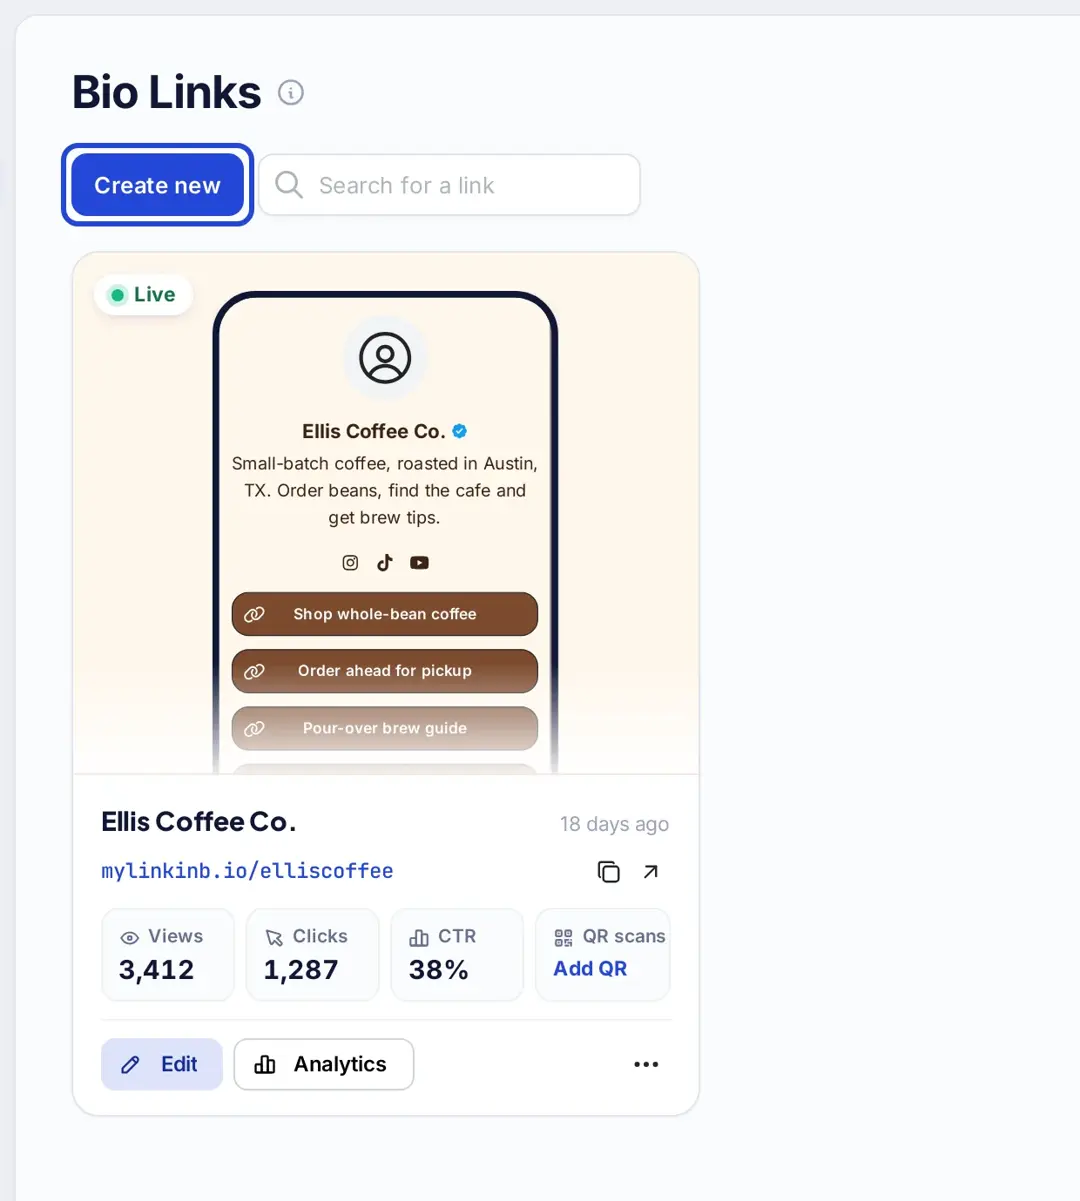
2. Go to “Bio Links” and click “Create new”
Once you’re logged in, click Bio Links in the left sidebar.
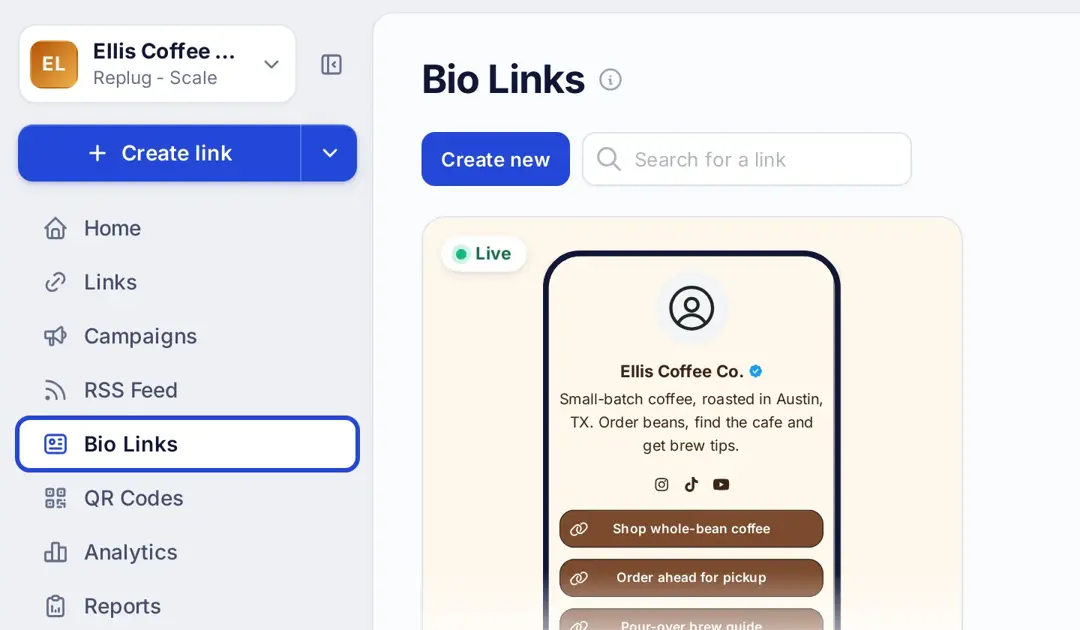
From there, simply click Create new to get started.
3. Pick a template or customize your design
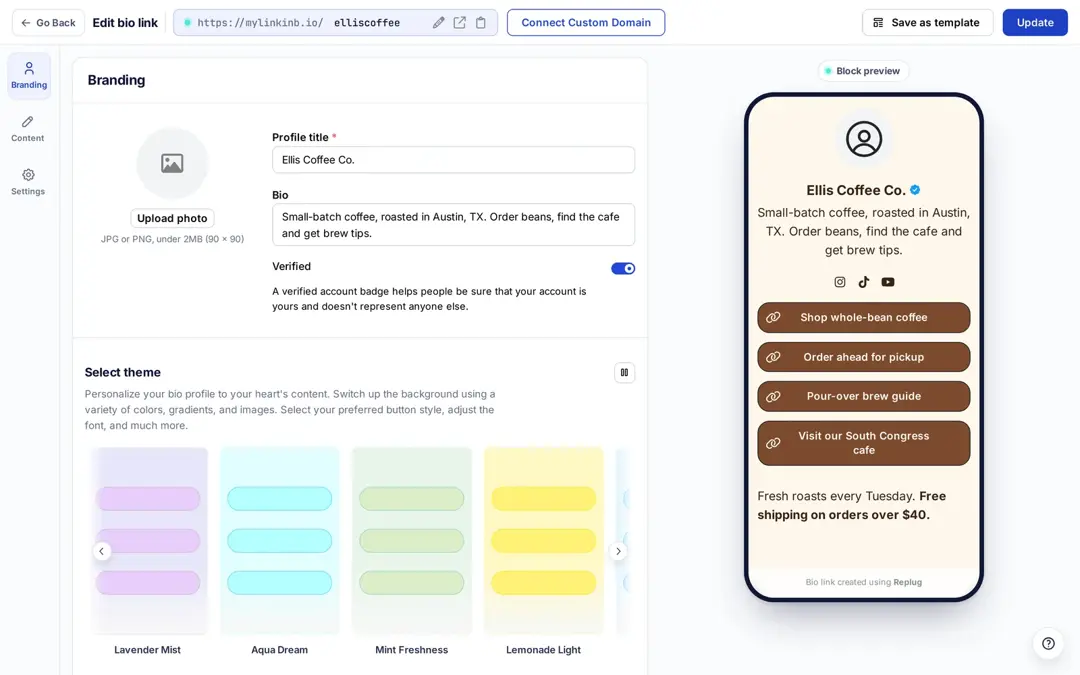
Start from one of the ready-made templates or a blank page. On the Branding tab, add your photo, profile title and bio, then pick a theme, button style and font; the live phone preview updates as you go. Custom themes and background images are part of Essentials and up, and the verified badge is on Scale and Agency, according to the pricing page.
Related: Linktree 101: How it works and why you need it
4. Add your links and content
Open the Content tab and choose blocks under Add a new block. Replug’s bio links page lists 18 block types (checked October 2026):
- On every plan: Links, Social icons, Video, Music, RSS feed, Card, Text, Separator and Spacing
- On Essentials and up: Carousel, Map, vCard, Messenger, Bookings (calendar), Countdown, Q&A, Shopify products and Email sign-ups
Each Links block holds up to 5 links, and you can drag blocks into the order you want.
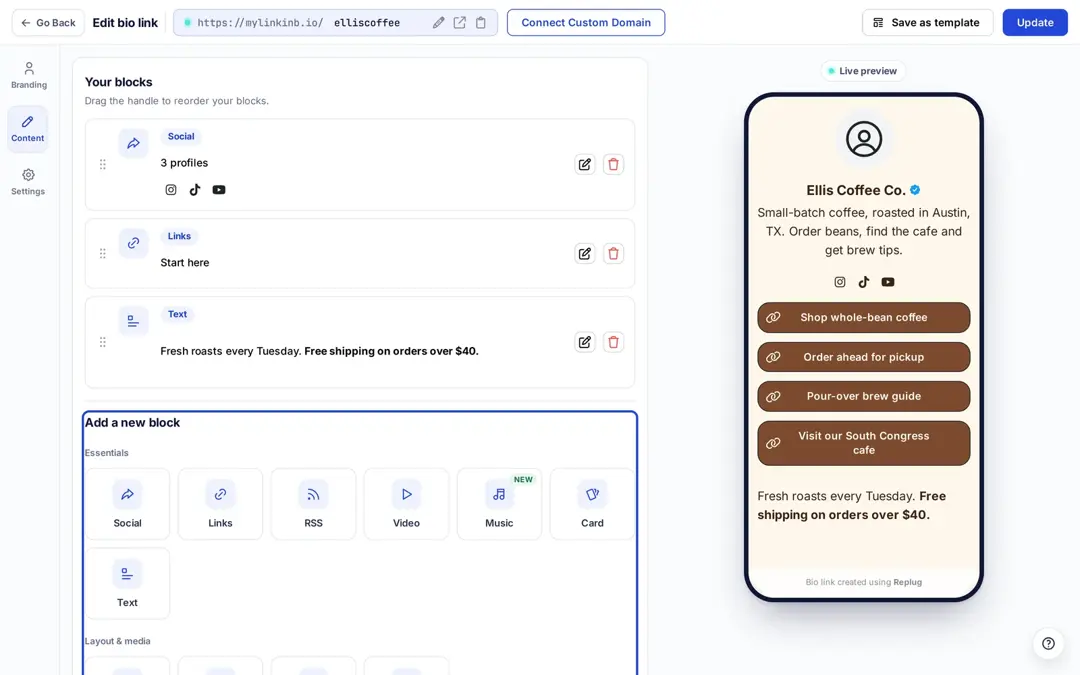
Pro tip: Keep the first button for the one thing you most want people to do, and name buttons by what people get (“Shop the fall roast”), not by the platform.
5. Optimize for search and sharing
Open the Settings tab to make your bio site work harder:
- Set a custom meta title, description and image so your page looks right in search results and when the link is shared (all plans).
- Add a custom favicon image to your bio site (all plans).
- Add a retargeting pixel from Meta, Google, TikTok or another ad platform so visitors can join an ad audience (Essentials and up). Replug adds the pixel; the ad platform builds the audience.
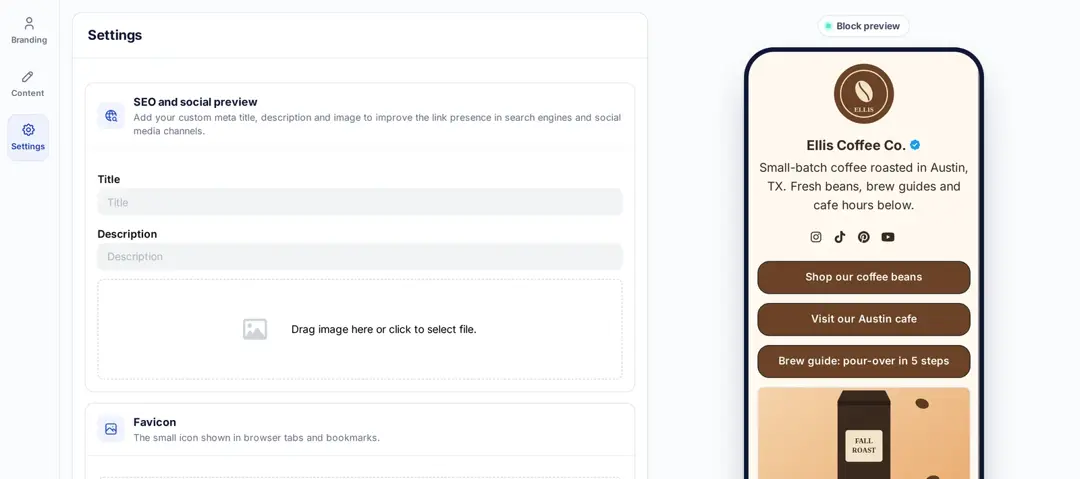
Want to make updates? No problem! You can edit your bio site anytime and click Update, and the address stays the same.
6. Publish and share your bio site
When your page is ready, click Publish. Your bio site gets an address on mylinkinb.io; click the pencil next to the address to change the ending to your name, which works like a vanity URL, or click Connect Custom Domain to use your own domain.
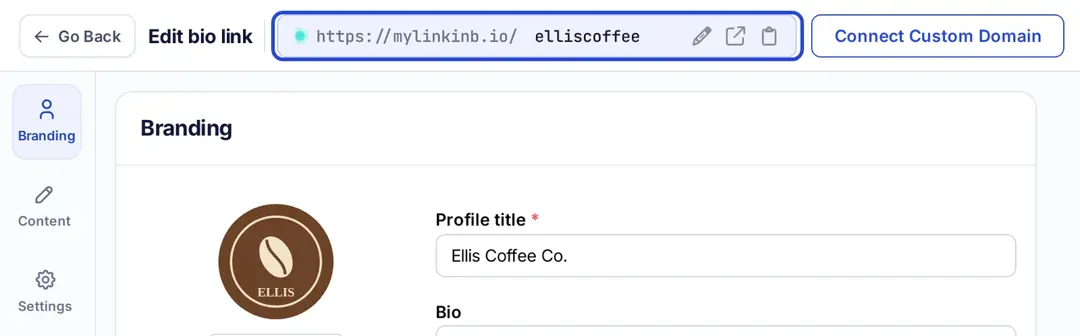
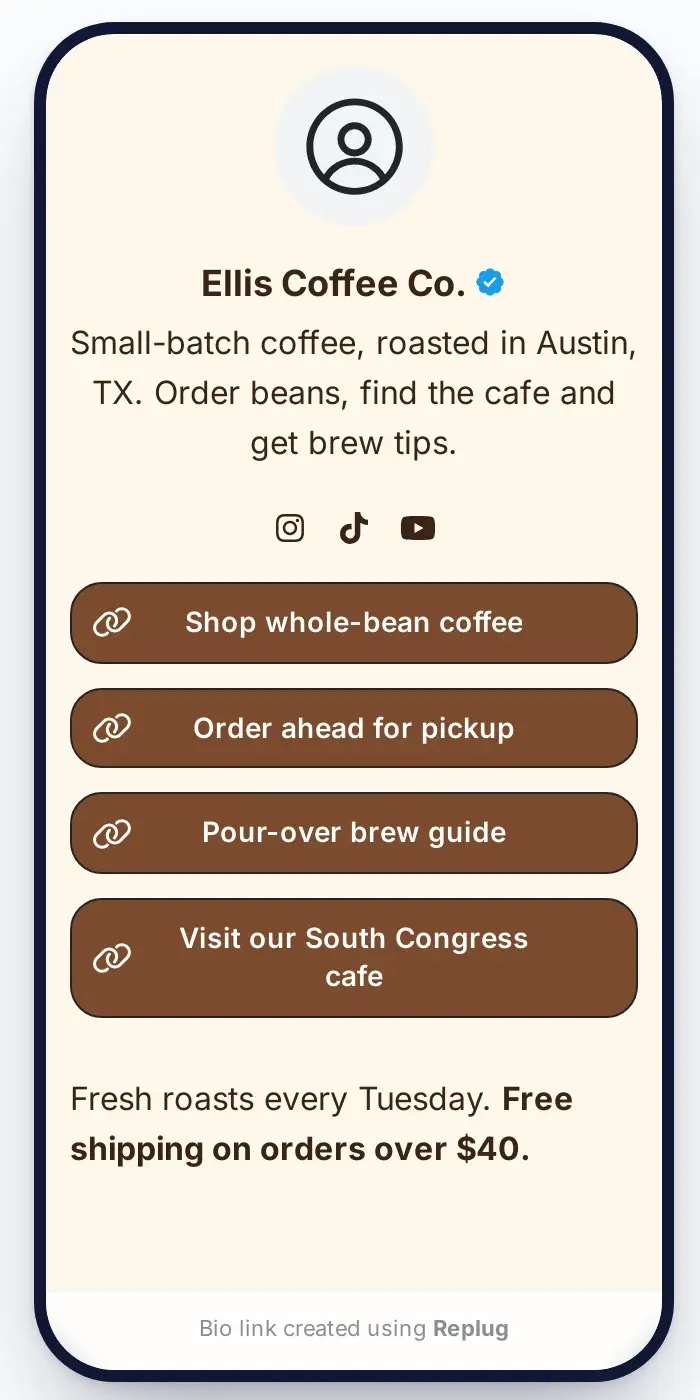
Then copy the link and add it to your social media bios, email signature, and anywhere else your audience can find you. Here’s what a finished bio site looks like:
After a few days, open the page’s analytics to see views, clicks on each link and where visitors came from.
Conclusion
Creating a bio site doesn’t have to be complicated. With a tool like Replug, you can set up a fully customized bio site in a few minutes. Instead of juggling multiple links, you’ll have one clean, organized hub for all your content. Follow the best bio link practices to get the most out of it.
Whether you’re a creator, entrepreneur, or business, a well-organized bio site makes it easier for people to find what they came for, keeps your branding consistent, and simplifies the way you share links.
You can also use this best free URL shortener to track clicks, optimize links, and manage all your URLs in the same place.
FAQs for how to create a bio site

Amna Yawar